The HaltH checkout is where you claim from a client's funding and take the gap payment in one step. This guide walks through each part of the checkout so you know what to check and change before you complete a transaction.
Open the booking in your practice management software and select Pay with HaltH. The checkout opens with the provider, client and appointment already filled in.
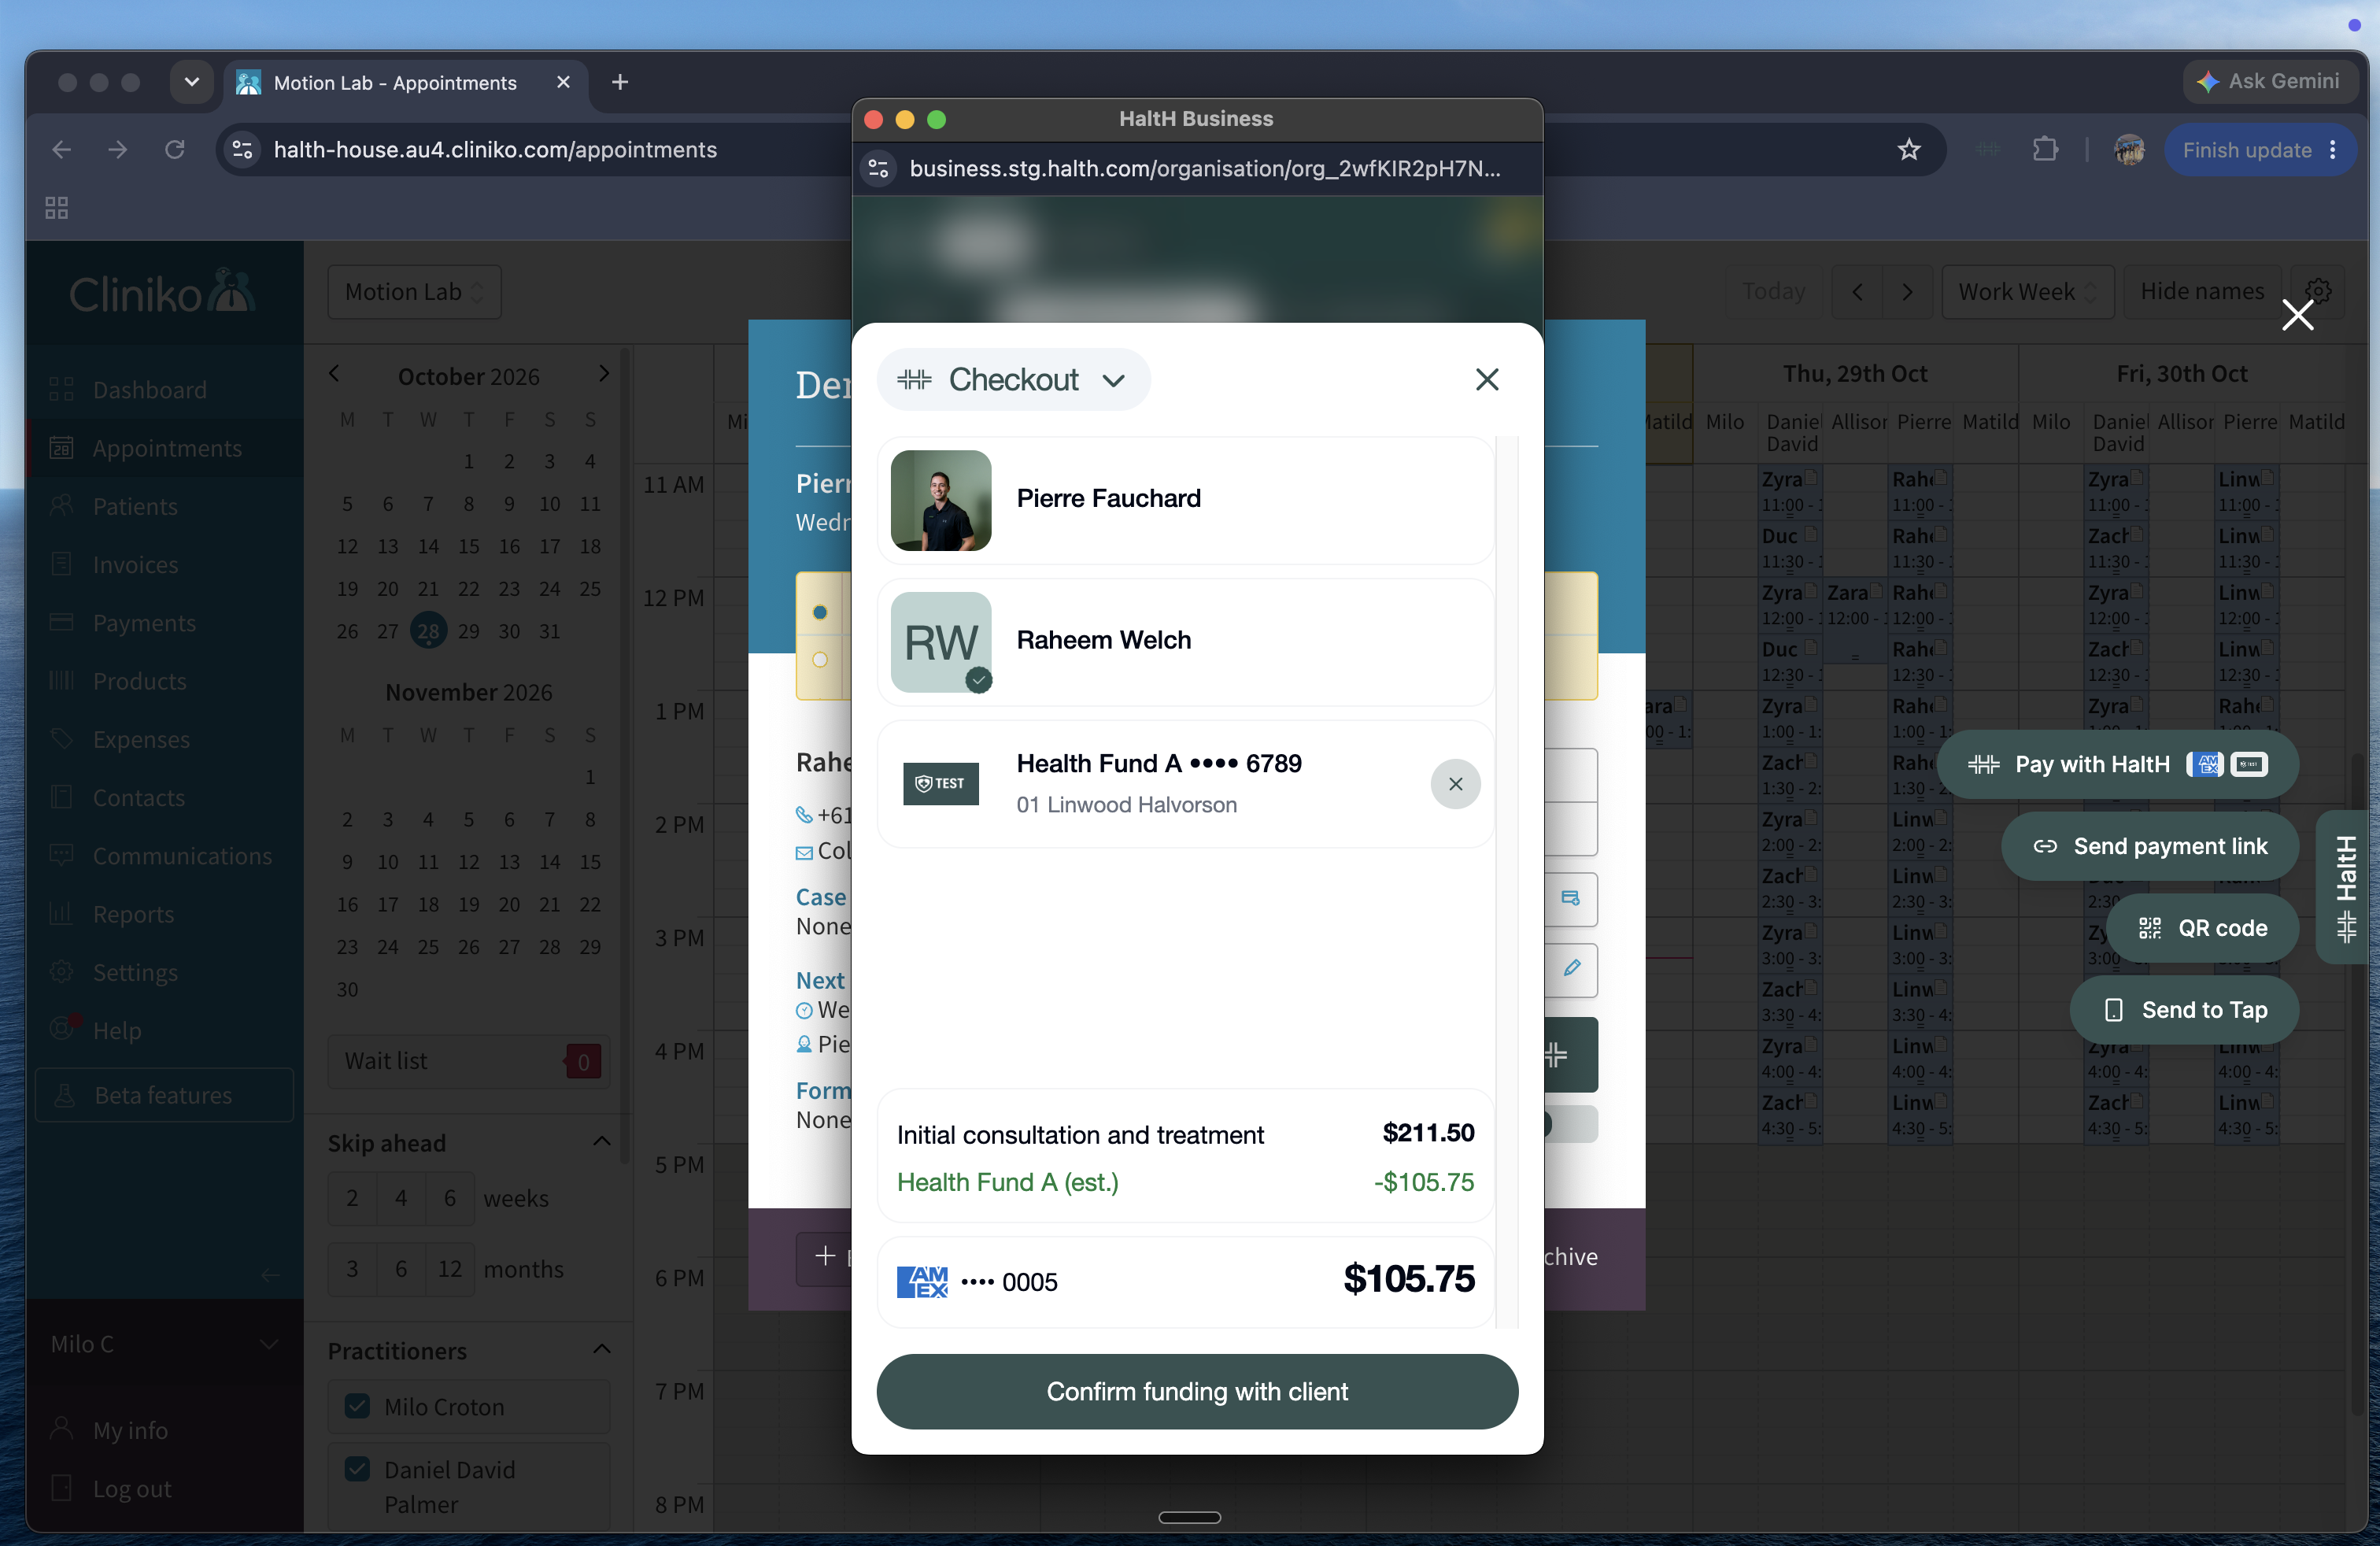
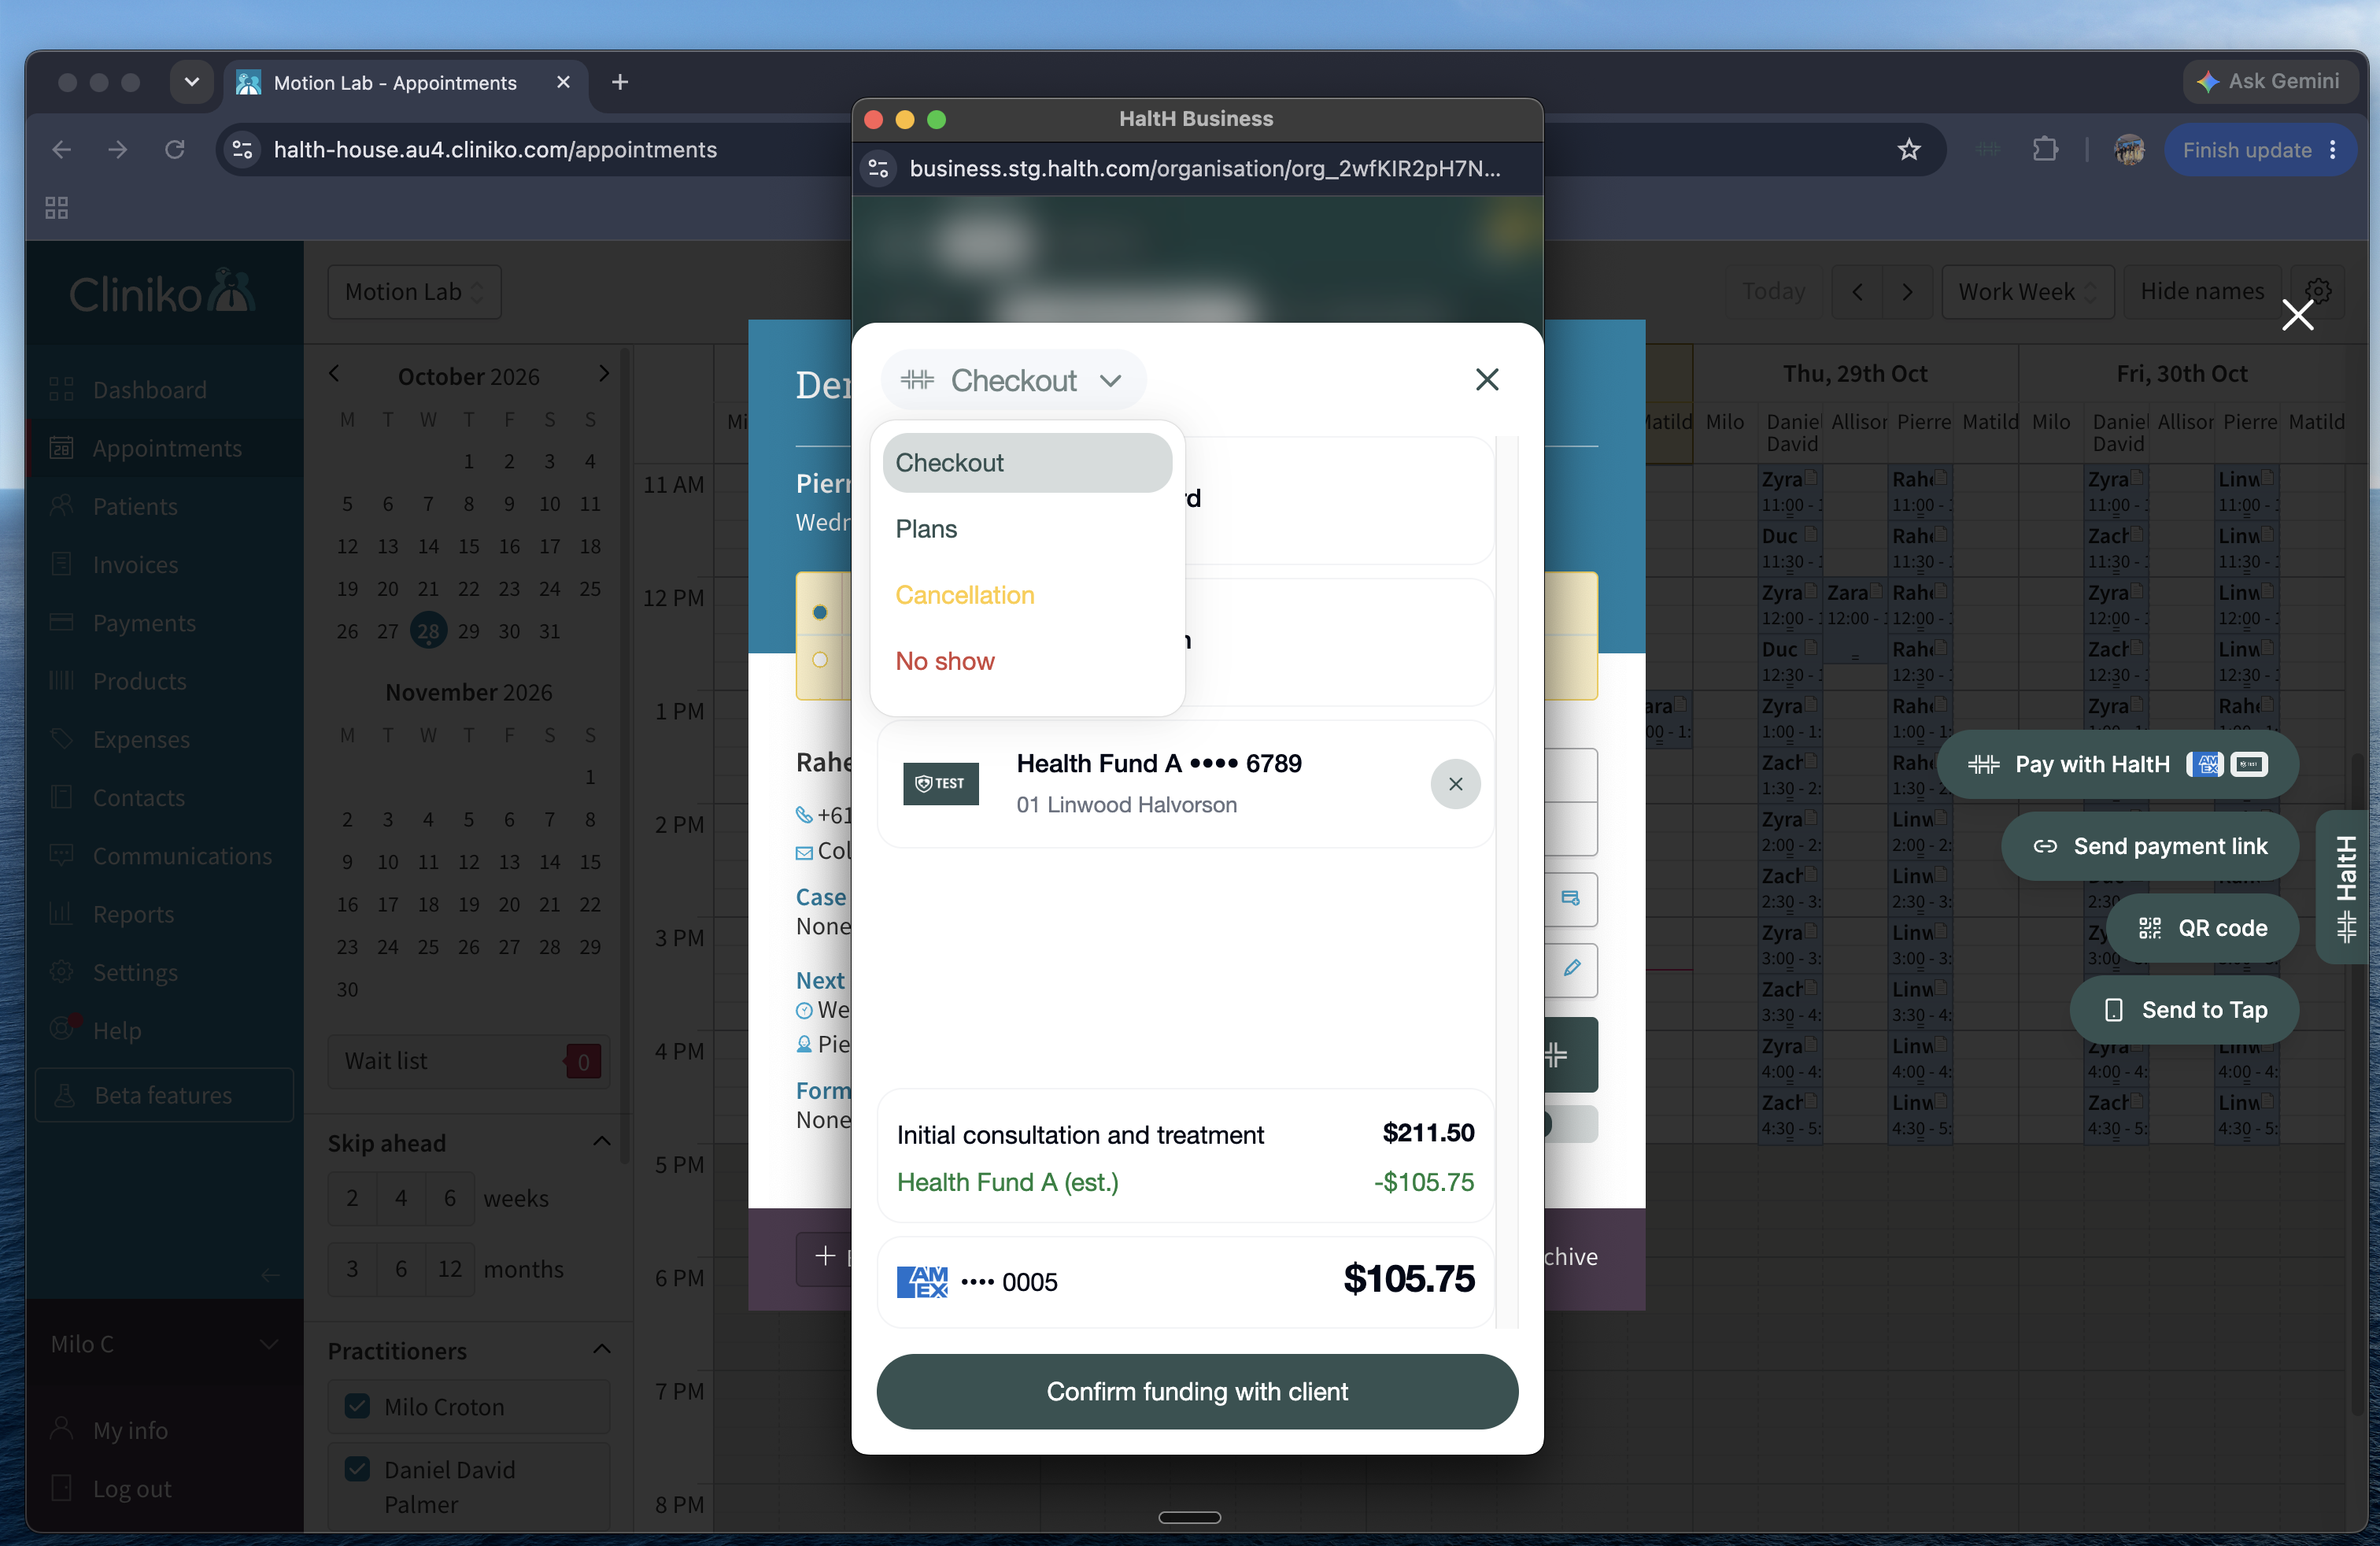
At a glance, the checkout shows the provider and client, any funding attached to the client, the items and price, the estimated rebate, the total and the payment method.
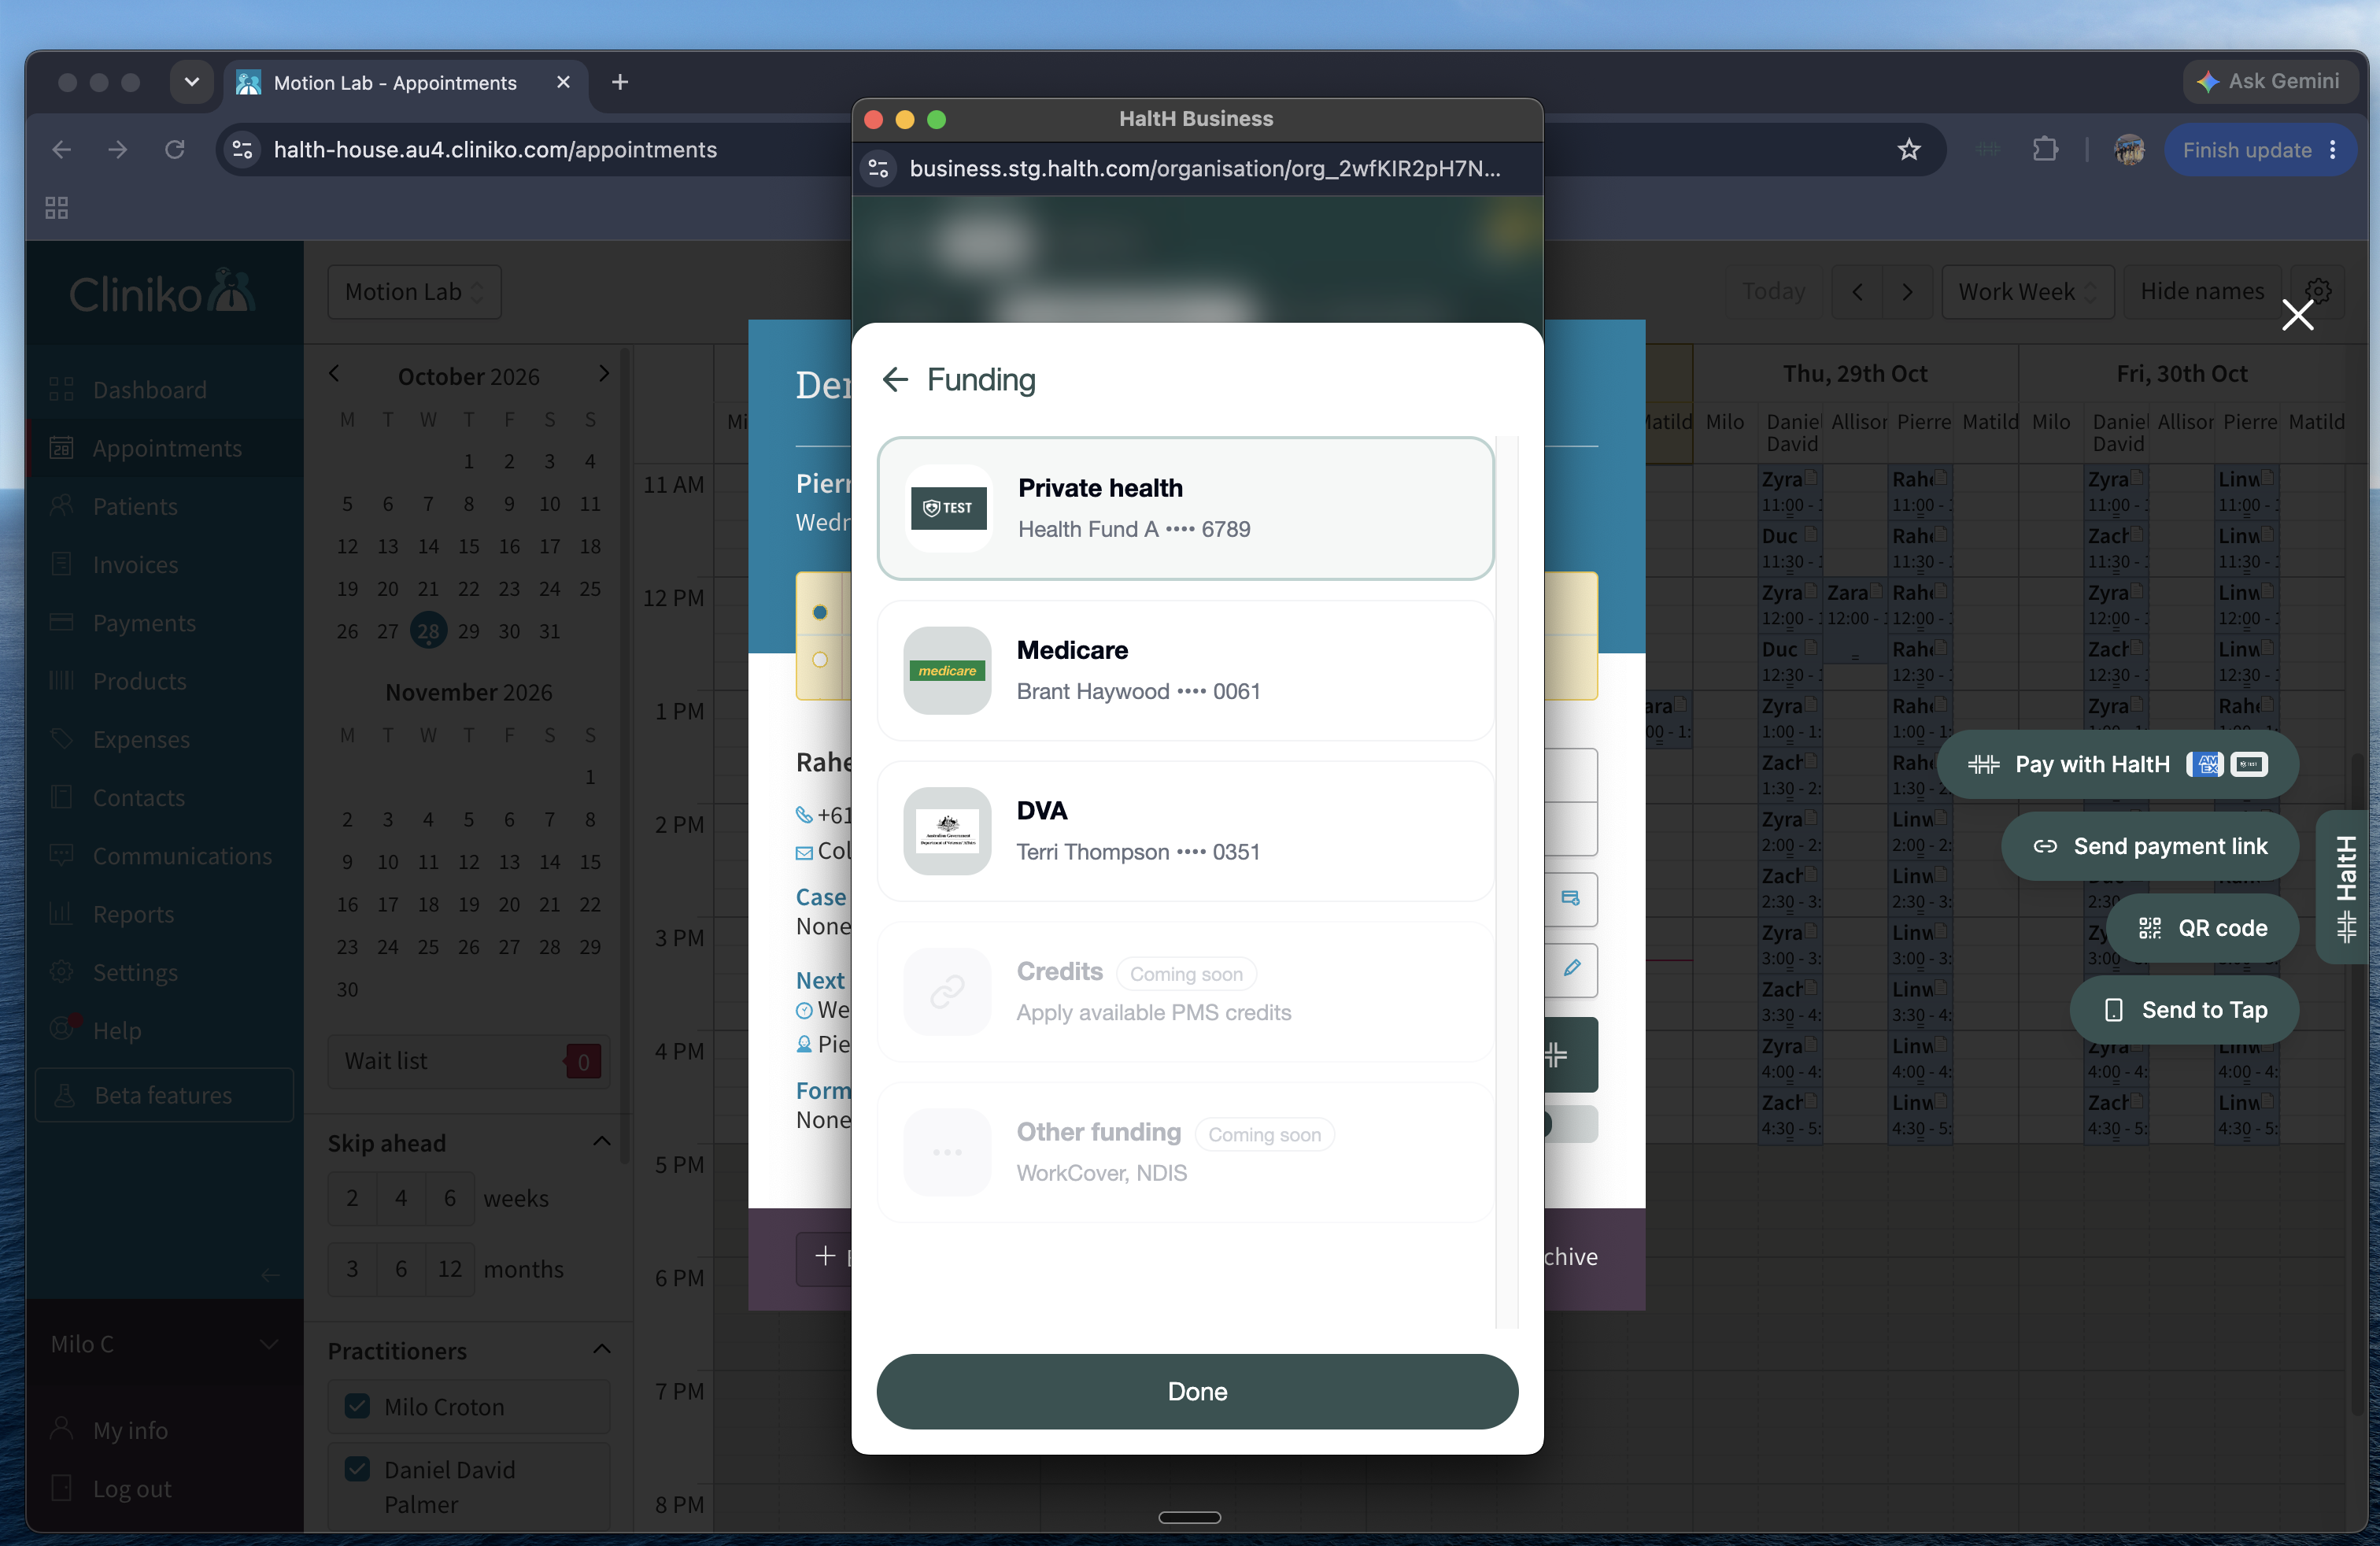
Select the funding section, or Add funding if nothing is attached. Choose a funding tile:
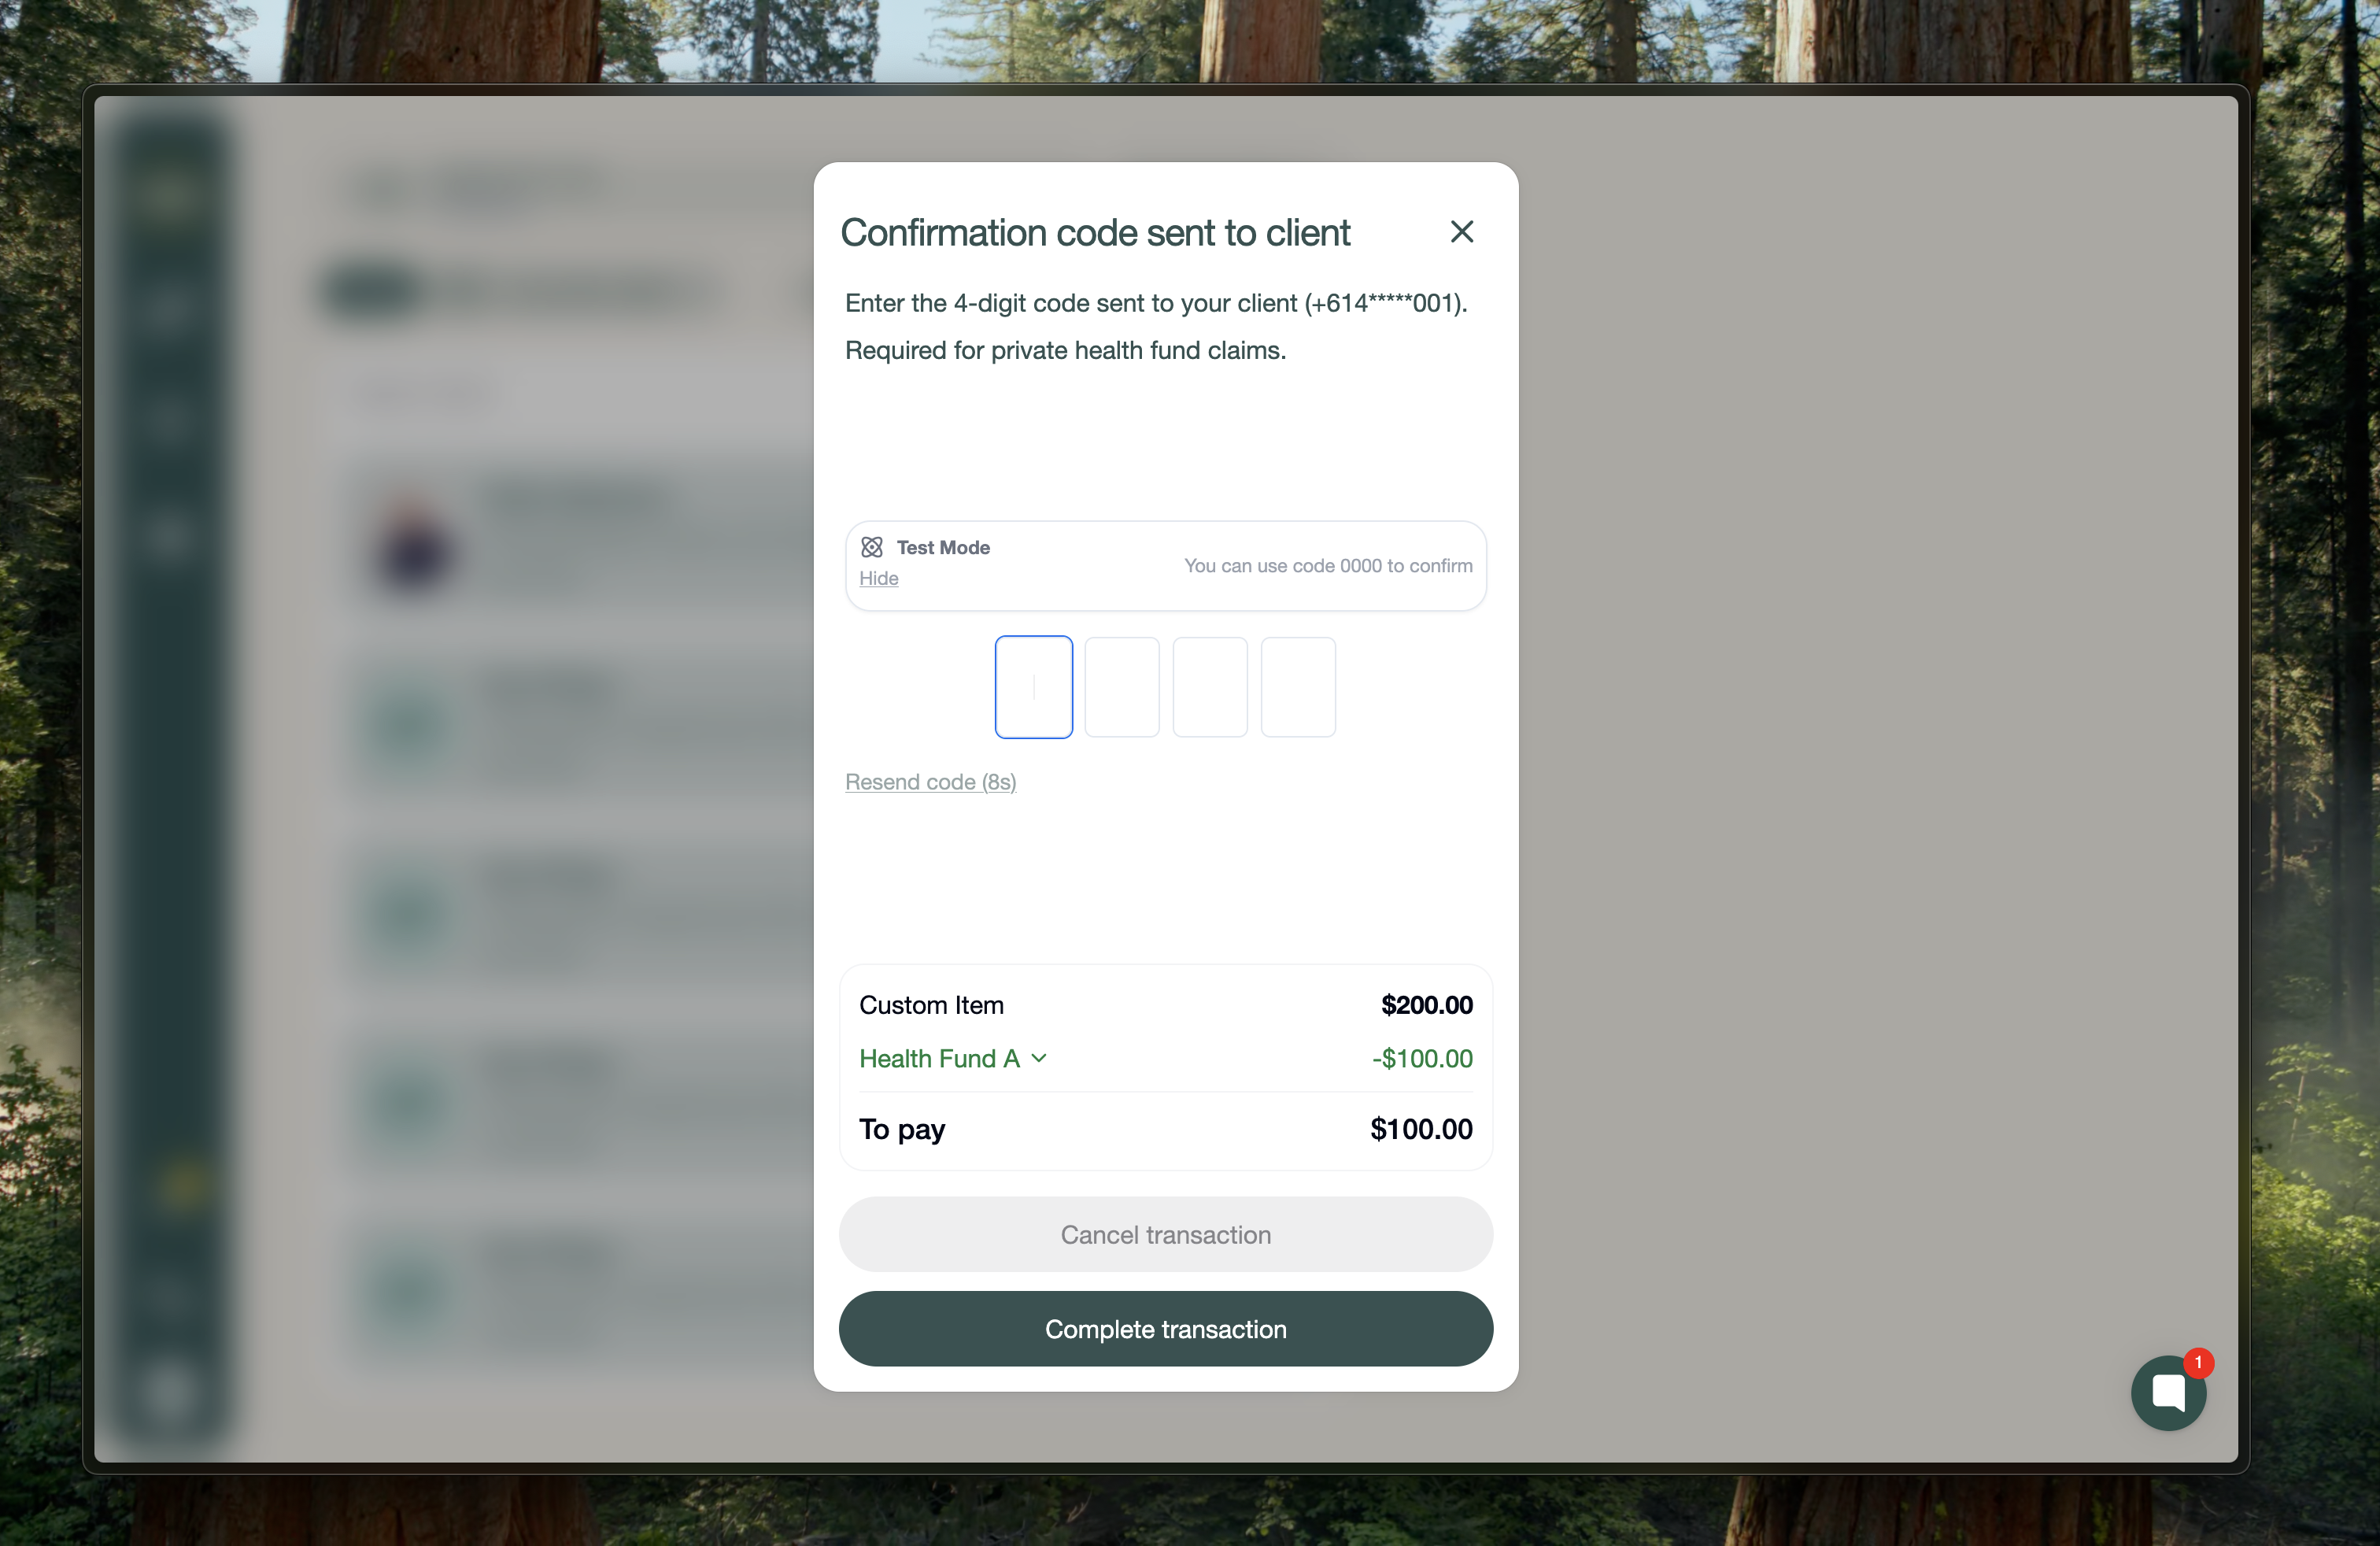
Private health: select or add a health fund card, and add or edit cardholders. HaltH checks the rebate with the fund in real time, so the out-of-pocket amount updates straight away. Private health claims need location turned on and a client confirmation code.
Medicare: select or add a Medicare card, then add the client's referral. The checkout shows the Medicare rebate.
DVA: select or add a DVA card, then add or select the referral. DVA claims don't collect a payment from the client.
Credits (PMS credits) and Other funding (such as WorkCover and NDIS) are coming soon.
For step-by-step claiming, see Make a private health claim at checkout, How to process a Medicare claim at checkout and DVA claiming with HaltH.
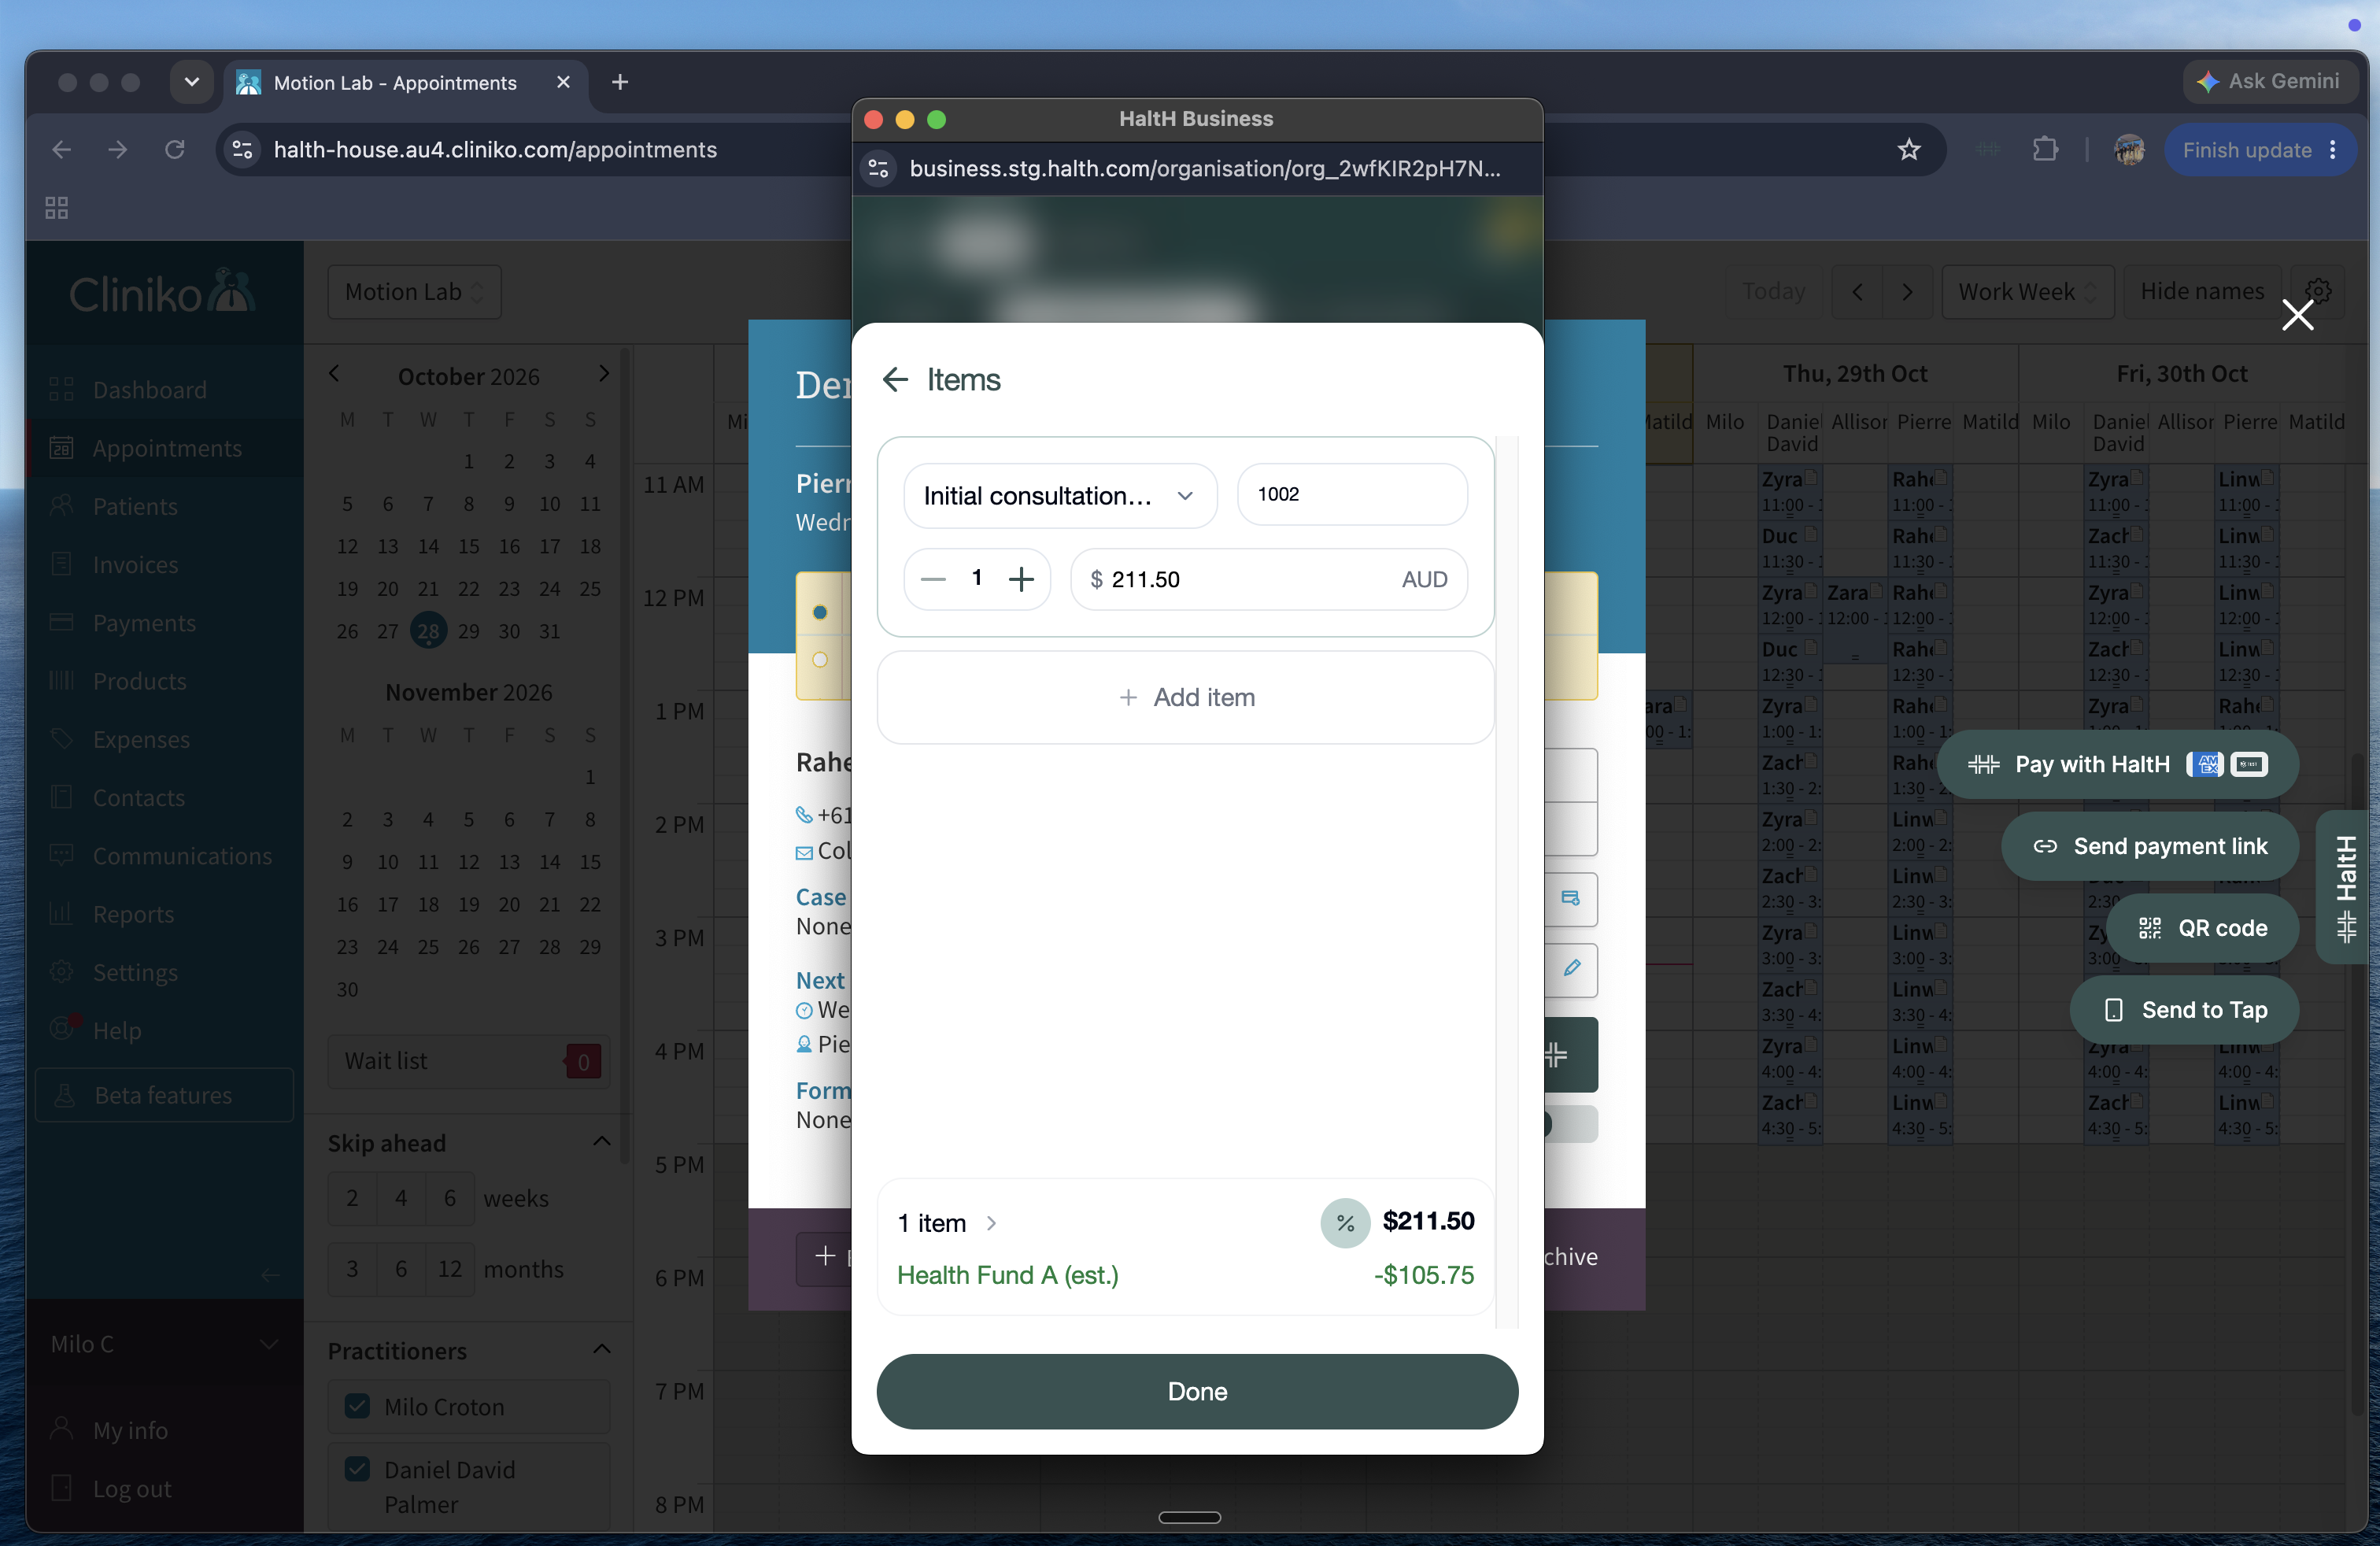
Select the items section to see everything being billed. You can:
Select an item's name to change it to a different appointment type or product.
Select the price to change it, and use + or − to change the quantity.
Check the item code. The item code tells the fund or Medicare which service you're claiming for, so it decides the rebate. Search the list, or type a custom code if yours isn't listed.
Add another appointment type or a product, such as a stretching band, from the add item screen. Choose Quick charge for a one-off amount.
Select Done to go back to the checkout.
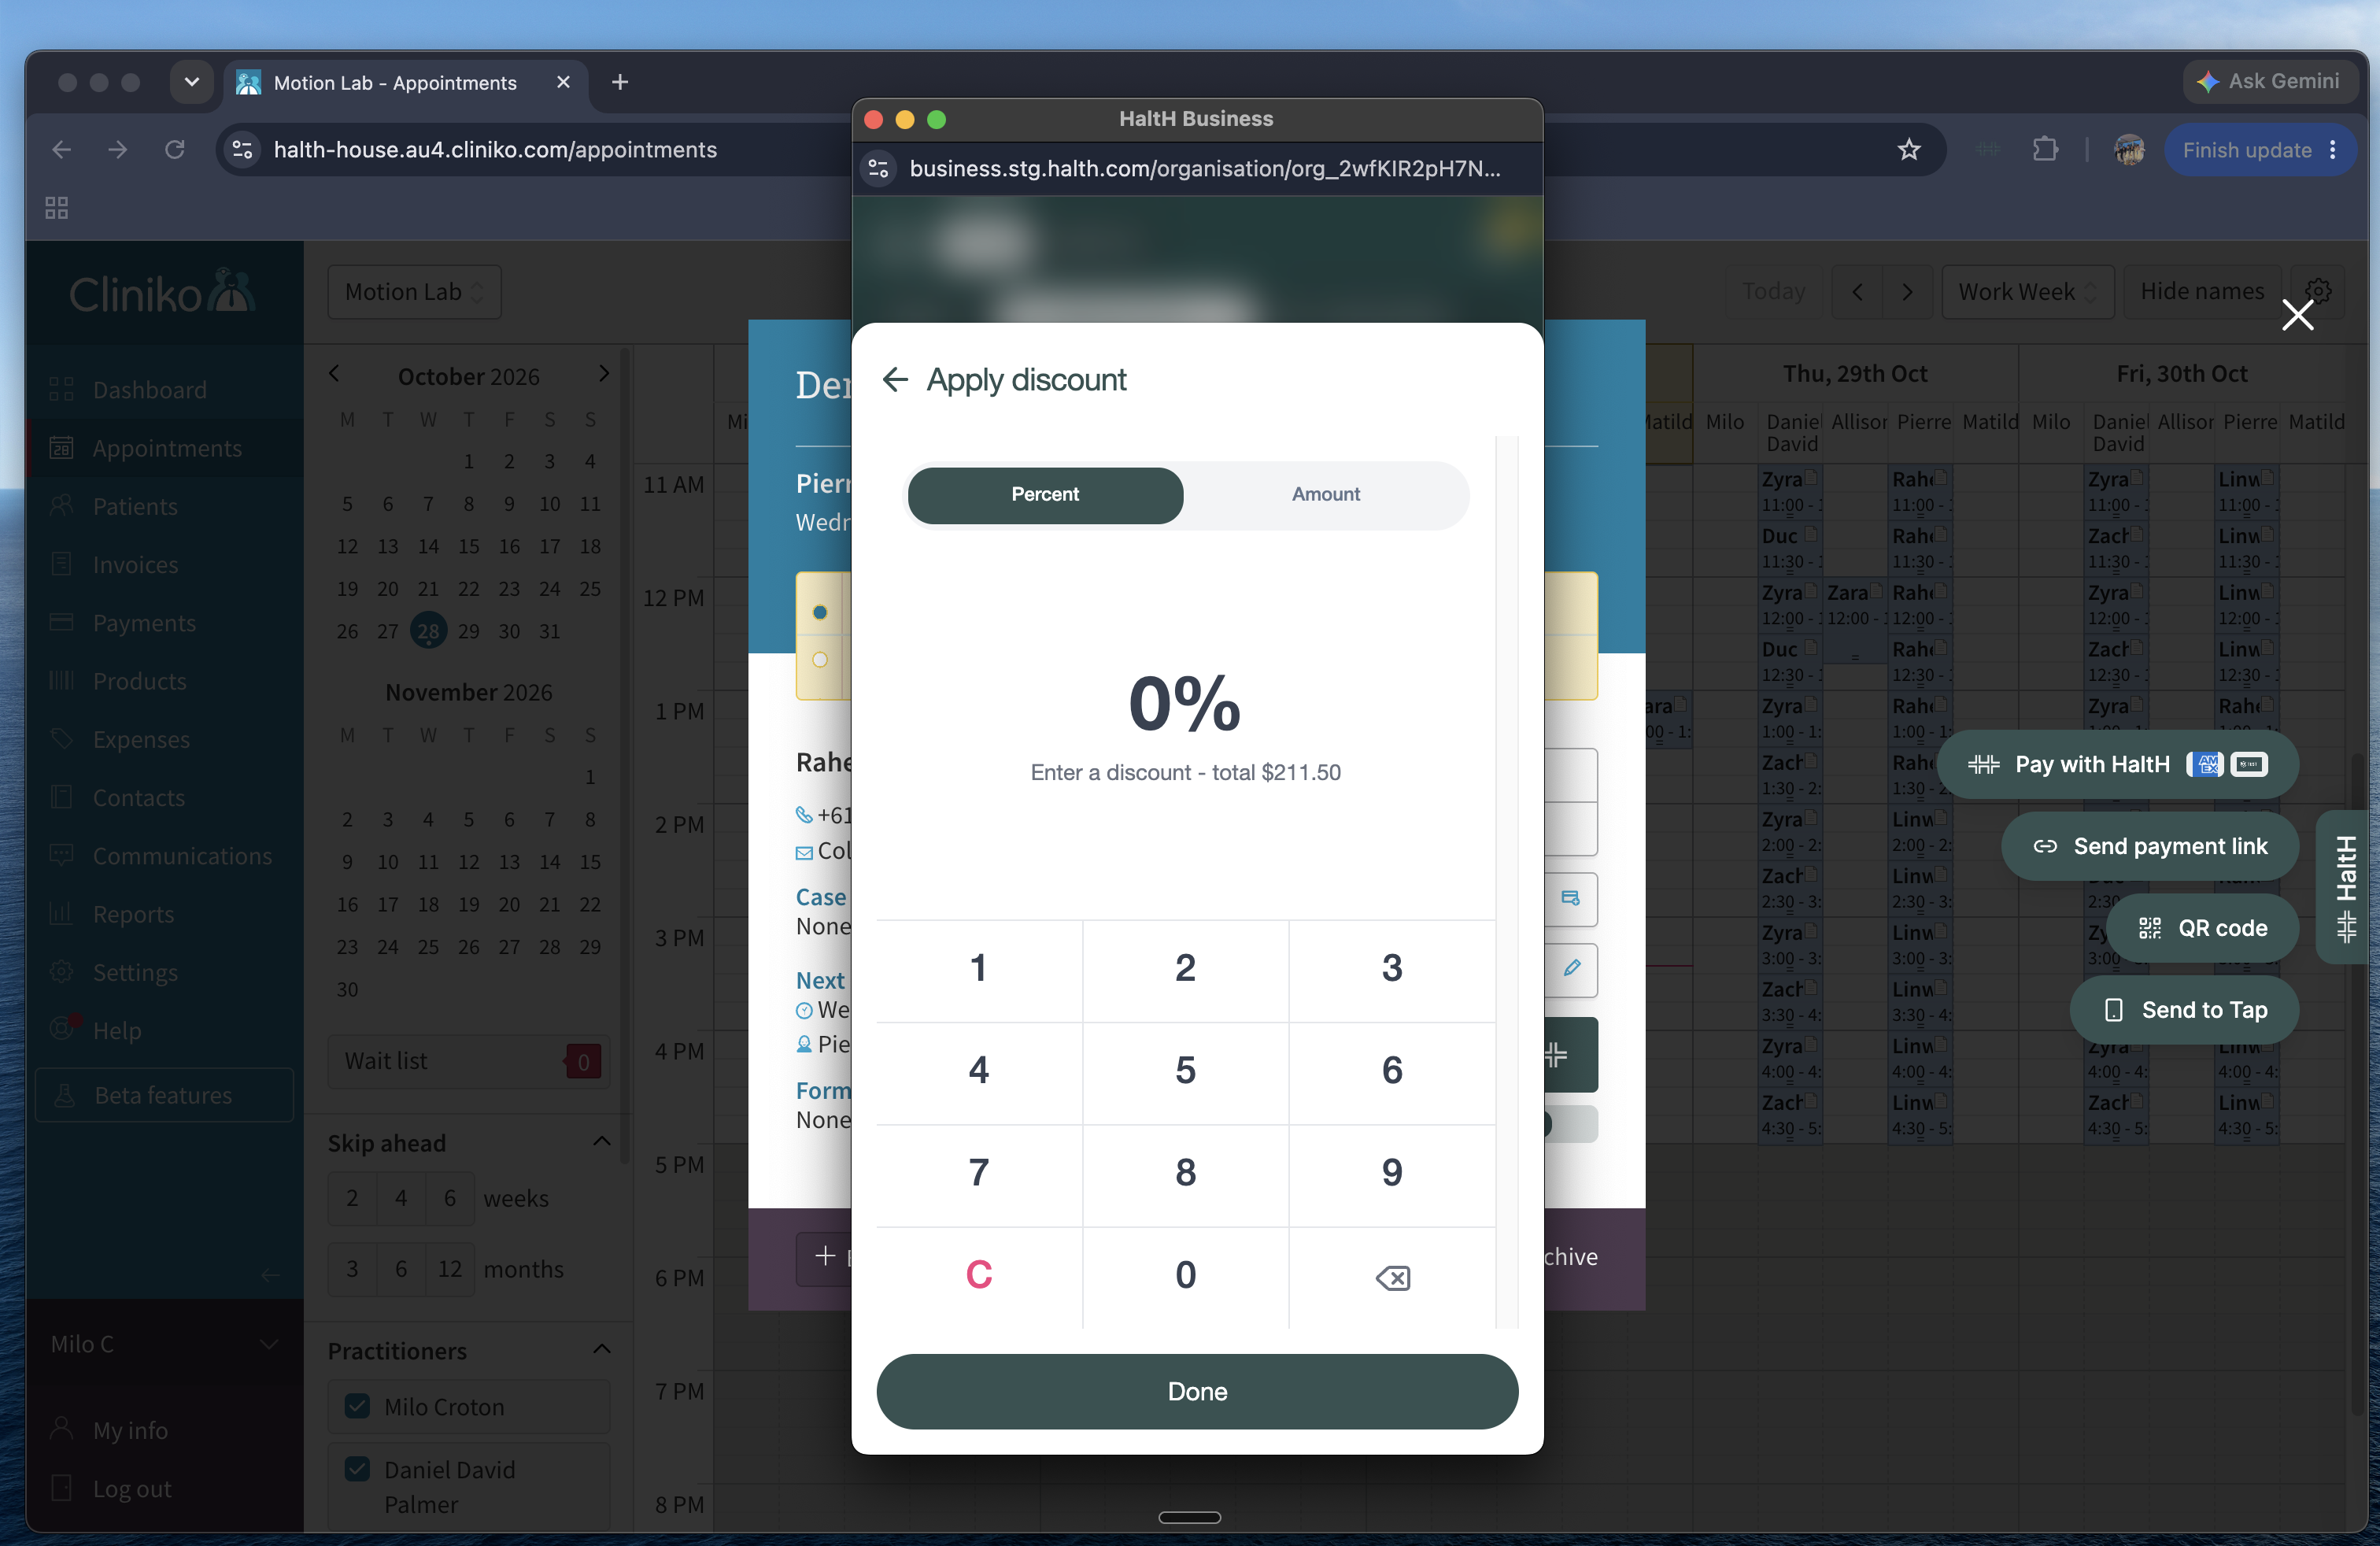
Select the item count (for example 1 item) to open Apply discount. Choose Percent or Amount, enter the discount, then select Done. A percentage discount can't be more than 100%.
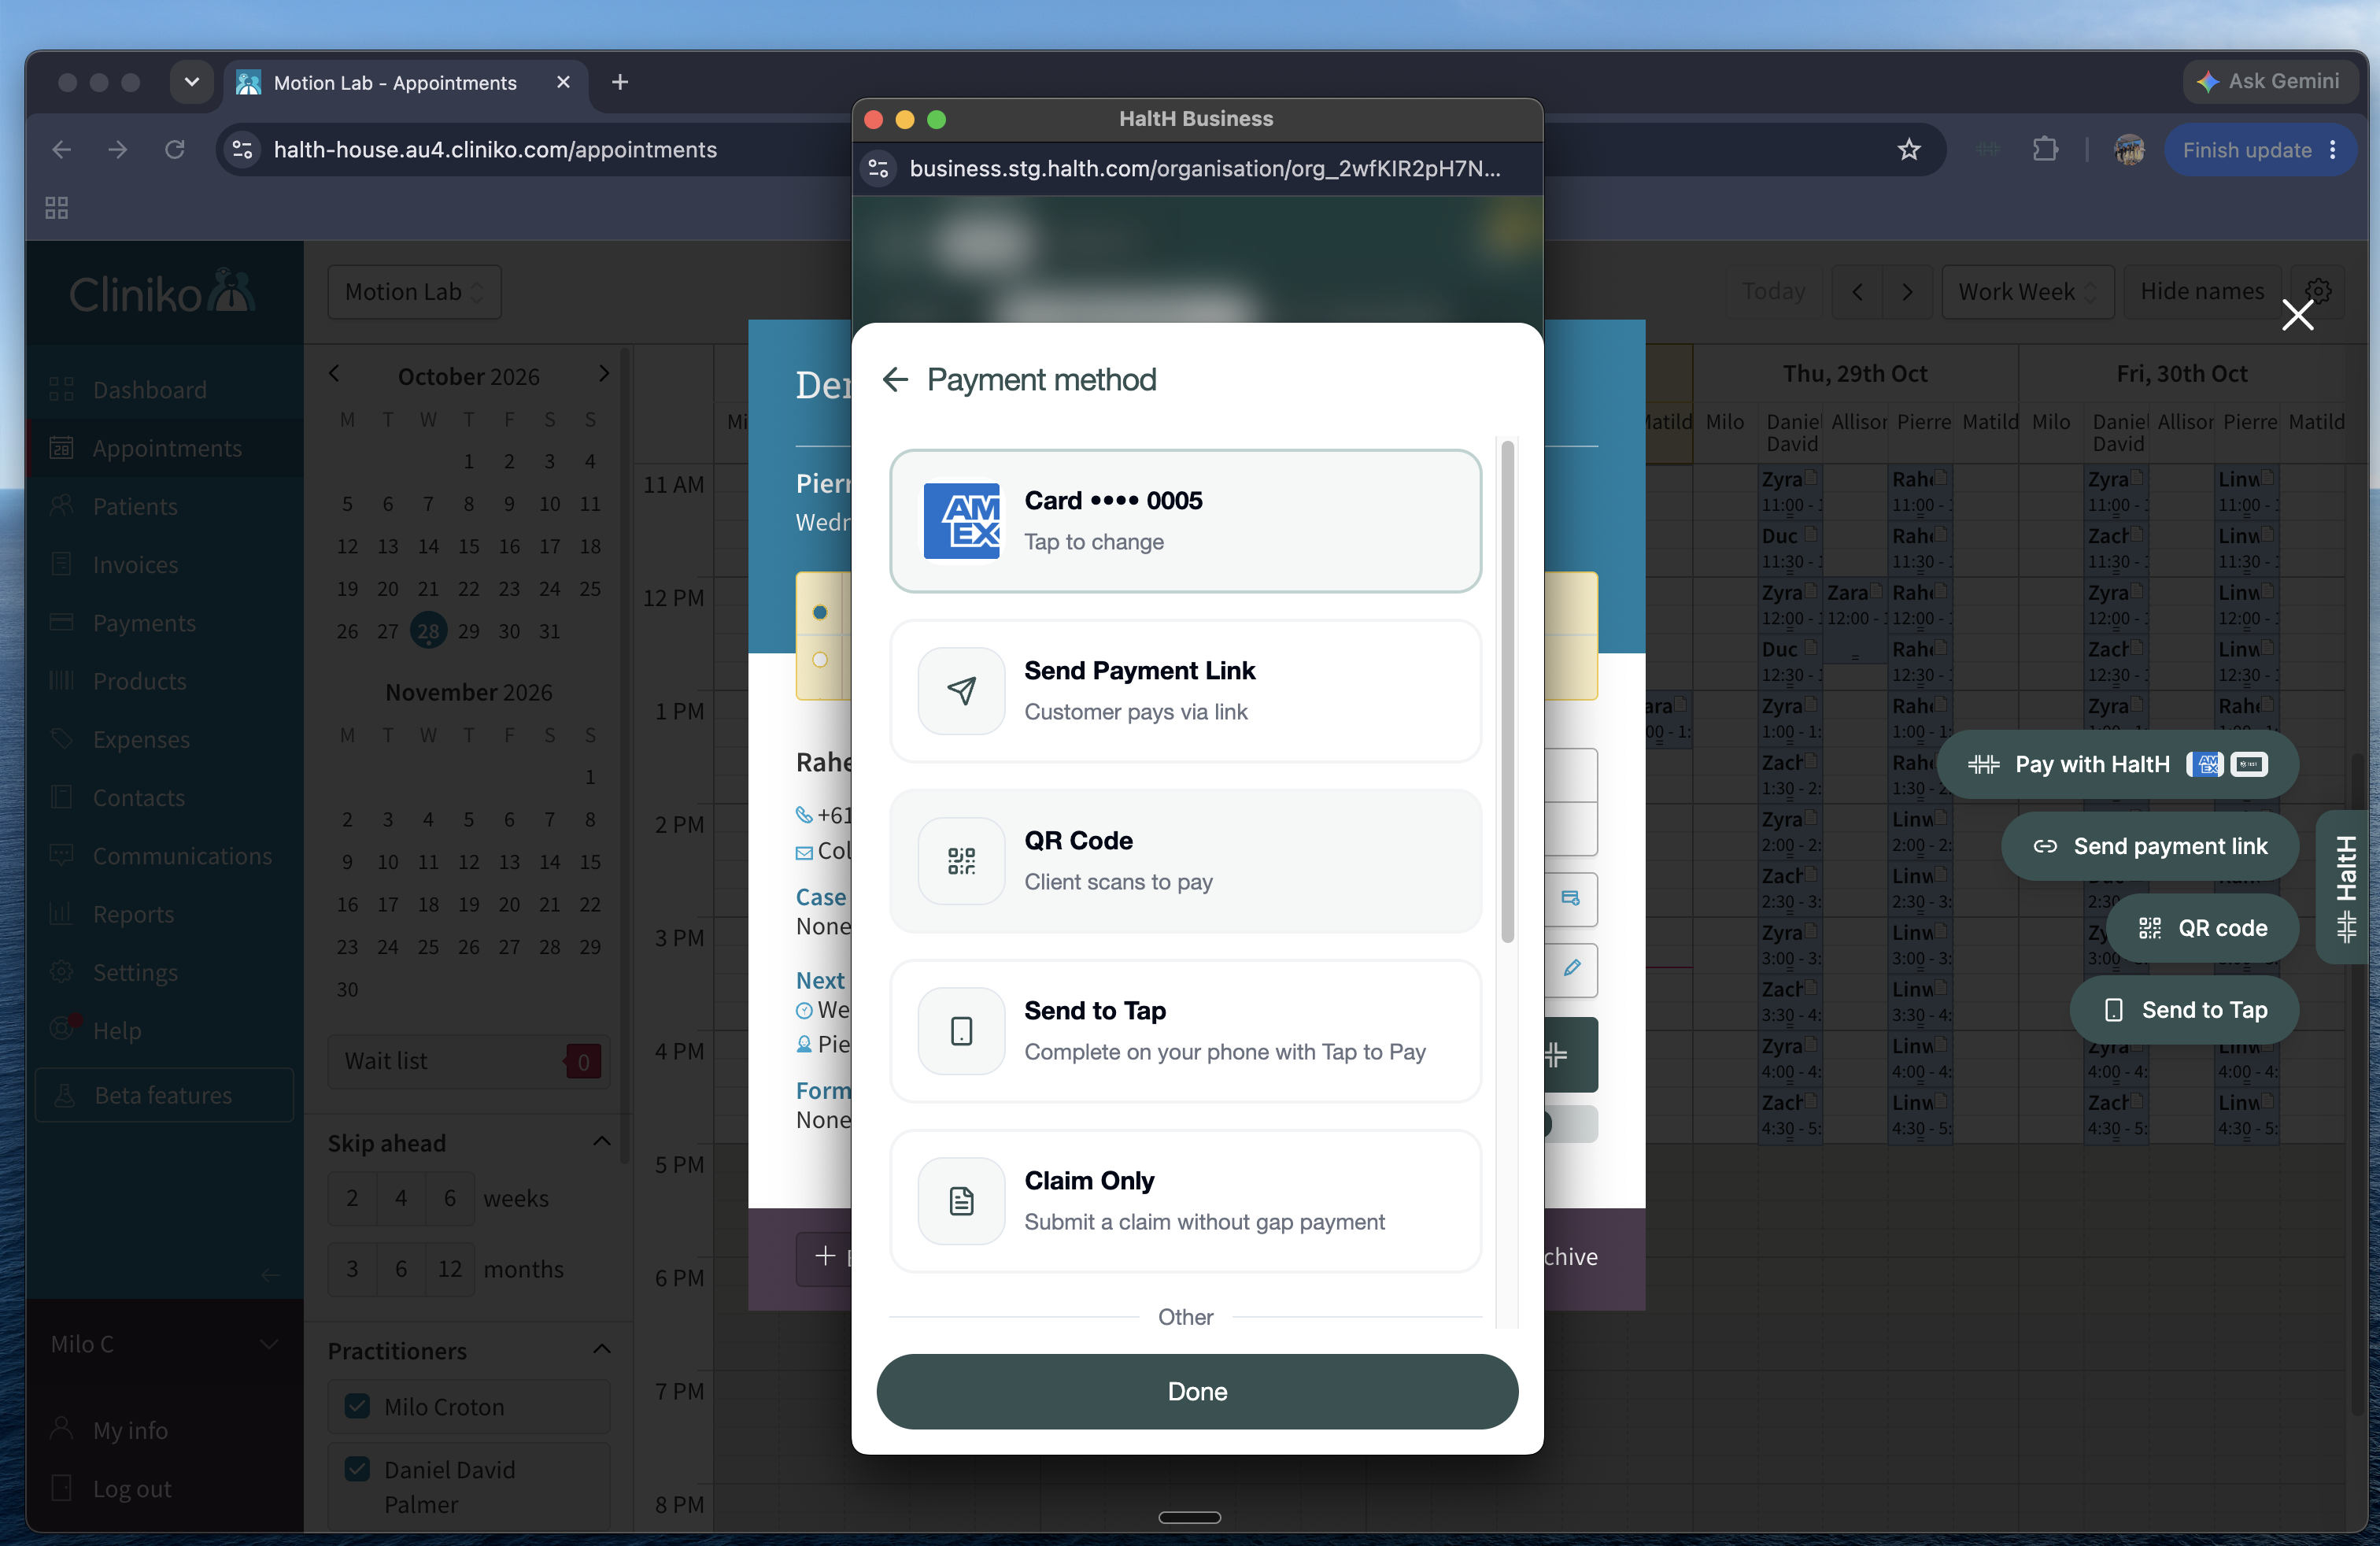
Select the payment method at the bottom of the checkout. Options you can't use right now are greyed out with the reason underneath.
Client's wallet: charge a card the client has saved, or add a new card. The button reads Charge saved card.
Send Payment Link: select Generate payment link, then send it by SMS or email, or copy it. The client sees what they're paying for and pays on their own device. You can cancel the link with Cancel payment link and check progress with View transaction status.
QR Code: select Generate QR Code and ask the client to scan it to pay on their phone.
Tap to Pay: take a contactless payment on your phone. Only available when you're using the HaltH app on iOS or Android.
Send to Tap: send the checkout from your computer to your phone and finish it with Tap to Pay. You need to have opened HaltH Tap on your phone recently.
Plan credit: redeem a credit from the client's plan instead of charging them. Only shown when the client has a credit that covers this session.
Claim Only: submit the claim without collecting a gap payment. Available with private health or DVA funding (DVA is always claim only). Medicare claims can't be claim only.
Some transactions need a 4-digit code that HaltH sends to the client's mobile. You'll see Confirm funding with client for private health claims, or Confirm transaction with client for larger or changed card payments. Ask the client to read you the code and enter it. See Client confirmation codes: when and why.
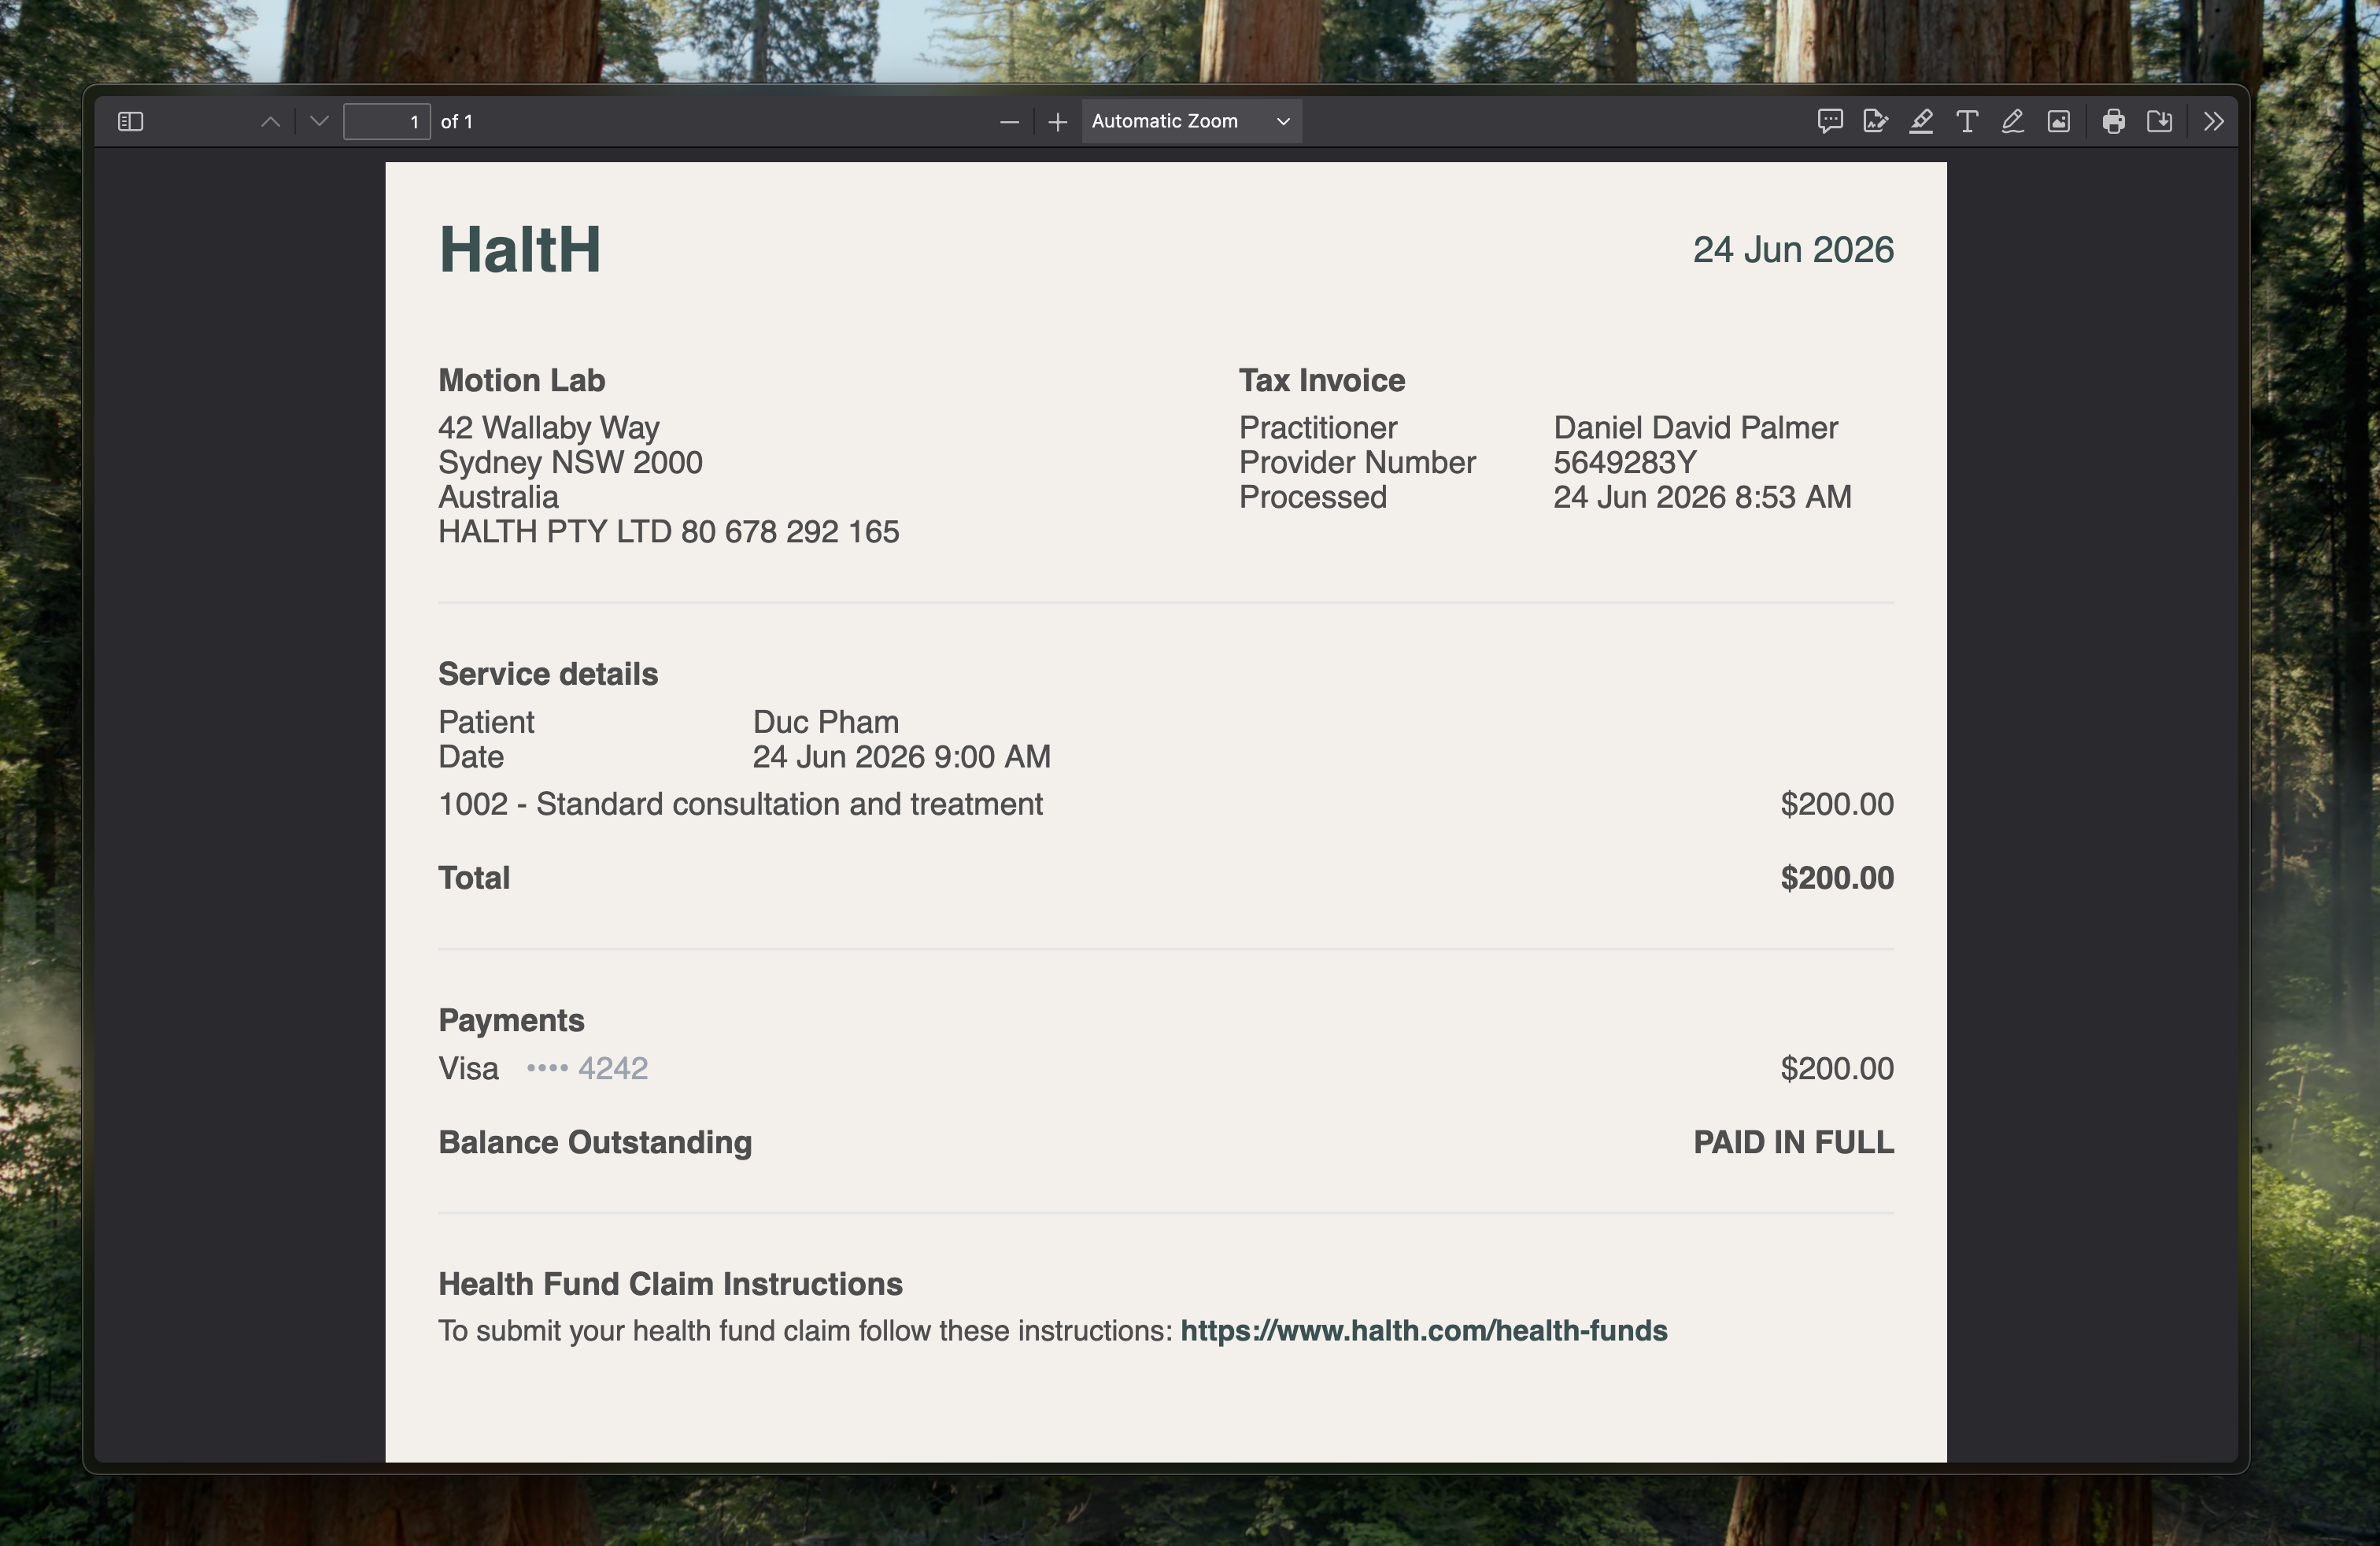
When the transaction is complete, HaltH asks if you'd like to send the client a receipt. Send it to their mobile number or email address. You can also download the invoice to review what was charged and claimed.
Select the menu at the top of the checkout (it shows Checkout) to switch between:
Checkout: a standard transaction for the appointment.
Plans: build a one-off or recurring plan for the client.
Cancellation or No show (for bookings): replaces the items with the fee from the booking's cancellation policy. These fees don't use health funding, so any funding is removed.
A payment option is greyed out. Read the line under it. For example, Unavailable with DVA funding or Open HaltH on iOS or Android.
The rebate looks wrong. Check the item code and the client's card details, then try again.
I can't submit a private health claim. Make sure location is on. See Enable location services for private health claims.
HaltH Tap
Take contactless payments on your phone with HaltH Tap, send a checkout from your computer to your phone, and save a client's card.